Overview
Stuck on this challenge? This walkthrough breaks down every step so you can move on quickly.
Your objective: Help Maddie find the tarot cards that reveal her destiny.
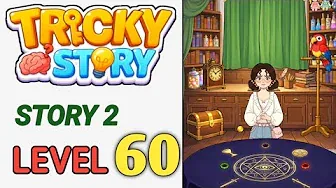
Welcome to Tricky Story Story 2 Level 60! Best friend Maddie (girl in white shirt with glasses in the center) comes to the mysterious divination house after experiencing layers of identity fog and campus turmoil. She needs to find 6 hidden crystal elements and sacred clues to completely activate the tarot pentagram magic circle on the table to reveal her final destiny (find the tarot cards that reveal her destiny). This level's core mechanism is environmental secret room puzzle counting mode (0/6). The divination table in front is painted with the grand four major tarot sacred object elements (Holy Grail, Star Coin, Sword, Wand) and has two flashing energy slots. You must link the green curtain, gold-framed clock, parrot, treasure chest on the ground and glowing orb in the room within 60 seconds. Each successful ritual or unlocking action will add "+1" to the progress bar. Collect 6 points to completely open the door of destiny!
Step-by-Step Walkthrough
Here's the complete solution. Follow these 8 steps in order — each one is a concrete action you take on screen.
- Swipe Right to Pull Open Huge Green Main Curtain in Back (Progress 1/6): Observe the green double-opening large curtain blocking the entire wall directly in the back. Press and hold the curtain fabric with your finger and pull it open horizontally to the right to let the mysterious starlight outside the window shine into the room.
- Pick Up Golden Glowing Orb Fallen at Maddie's Feet (Progress 2/10 Preparation): Notice directly below Maddie's light blue jeans feet on the floor. A rolling golden glowing small orb is lying quietly. Click and hold this small orb to pick it up from the ground and lift it up.
- Embed Orb into Front Divination Table Energy Slot (Progress 2/6): Drag the just-obtained golden orb downward to precisely snap it into the green glowing ring slot on the left side of the blue divination cloth tabletop in front.
- Continuously Click Colorful Parrot Perched on Right Wooden Rack (Progress 3/6): Move your view to the golden perch in the right front where a red-feathered blue-winged large parrot is perched. Continuously click the parrot 3 times quickly. It will flap its wings and cry, shaking down hidden mechanisms on high shelves. Progress bar successfully adds 1.
- Rotate Classical Gold-Framed Clock on Left Desk (Progress 4/6): Cast your gaze to the red wooden desk on the left. A retro golden round-top clock is on it. Rotate the long pointer on the clock dial clockwise one circle with your finger to forcibly change time and trigger physical layer anomaly in the room.
- Open Locked Golden Treasure Chest on Lower Left Floor (Progress 5/6): When time and light are adjusted, click the golden leather treasure chest on the lower left floor. Click its metal lock buckle to flip it open and obtain the second ruby glowing medium hidden inside.
- Adhere Ruby Orb to Right Energy Slot (Progress +1 Preparation): Drag the ruby glowing bead taken from the treasure chest and snap it tightly into the red glowing ring slot in the lower right corner of the divination table.
- Click Central Star Magic Circle to Complete Final Destiny Revelation (Progress 6/6): When all 5 prerequisite rituals of opening window, throwing ball, training bird, adjusting clock and opening treasure chest in front are correctly activated in place (progress bar reaches 5/6), click the star cat-eye pentagram magic circle itself in the very center of the blue tablecloth emitting purple strong light with your finger. The magic circle instantly brightens greatly and spits out three ancient destiny tarot cards (progress bar fills to 6/6 full)! Maddie pushes her glasses and shows a perfect smile full of hope and relief for the future looking at the card face. Extra divination grand settlement perfect clearance!
Pro Tips
Use these tips to make things easier — they cover the common traps and fastest route through.
- Multi-finger multi-point connection extreme speed flow: Pulling open back large curtain (Step 1) and picking up golden small orb on ground (Step 2) belong to two independent height layers that do not have physical conflict. In the first 5 seconds of opening, you can use left thumb to swipe open curtain while right hand quickly drags small light ball on ground. This two-finger parallel operation can save 5 seconds of surplus in the 60-second hard time limit.
- Pay attention to energy bead adsorption sequence: This divination magic circle has strict color spectrum collision hard coding. The golden glowing small ball (Step 3) must be precisely thrown into the green glowing slot in the lower left corner. If wrongly thrown into the red slot in the lower right corner, it will be judged by the system as invalid resistance and directly bounced back to original position.
Still Stuck?
If the solution isn't matching what you see on screen, double-check the screenshot above to confirm you're on the right page, then follow the video walkthrough step by step. For other stages, browse the full Tricky Story walkthrough directory.